
The Perfect Burger Bun
- 6 days ago
- 2 min read
Updated: 8 hours ago
Introduction
Let’s be honest… when it comes to burgers, most people focus all their attention on the filling. The patty, the toppings, the sauces – they all matter, of course. But here’s the thing I always say in my kitchen: the bun is just as important as the burger itself. In fact, I’d go as far as saying it can make or break the whole experience.
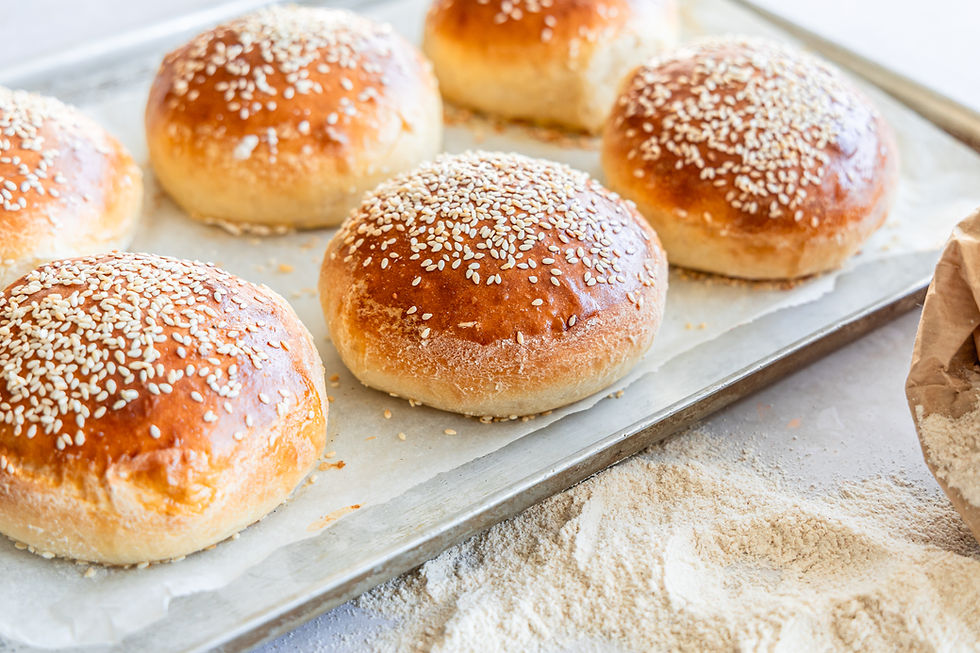
These photogenic burger buns are soft, golden, and beautifully structured – the kind of buns that don’t just hold your burger together, but elevate it. They’ve got that light, fluffy interior with just enough richness from the milk, butter, and egg to give you a proper bakery-style finish. And the best bit? They look as good as they taste.
Now, I’ve baked a lot of bread over the years, and I’m always chasing that perfect balance between flavour, texture, and appearance. These buns tick every box. They’ve got that smooth, rounded top that photographs beautifully (and yes, that tight shaping step is key), and they hold their shape brilliantly when stacked high with your favourite fillings.
But here’s the real seal of approval – my 14-year-old son gave these buns his official thumbs up. And trust me, that’s a tough crowd. If they pass that test, you know you’re onto something special.
So whether you’re firing up the barbecue, cooking up a midweek burger night, or just fancy taking your homemade burgers to the next level, these buns are the way to do it.
Let’s get baking…
Makes
6 buns (approximately 125g each)
Ingredients
500g strong white bread flour
40g caster sugar
10g fine sea salt
7g instant dried yeast
1 large egg (about 50g)
280g whole milk, lukewarm
50g butter, softened
For finishing
1 egg
15g milk
Sesame seeds or black sesame seeds (optional)

Here's how
1. Make the dough
Add the flour, sugar, salt and yeast to a bowl and mix well.
Add the egg, milk and butter, then bring everything together into a dough. Knead for about 8 minutes until it starts to become smooth and elastic.
2. First rise
Cover the dough and leave it to rise until doubled in size – this will take around 1 to 1½ hours depending on how warm your kitchen is.
3. Divide and shape
Tip the dough out onto a work surface and divide into 6 equal pieces.
Shape each piece into a tight ball by pulling the edges underneath and gently rolling against the surface. This step is key for getting that smooth, rounded finish.
Place the buns onto a lined baking tray, leaving space between each one.
4. Flatten slightly
Gently press each ball with your palm to create a squat dome shape rather than a tall roll. You’re aiming for about 7–8cm across.
5. Final proof
Cover loosely and leave to prove for 45–60 minutes, until the buns are puffed up and light.
6. Egg wash
Whisk the egg with the milk and carefully brush over each bun. Sprinkle with seeds if using.
7. Bake
Bake in a preheated oven at 190°C (fan) for 12–15 minutes, until evenly golden.
Top Tip
If you want that perfect bakery-style finish, don’t rush the shaping. Creating tension on the surface of the dough is what gives you those smooth, photogenic tops.
Happy cooking!


Comments